Installation
Import the Narramancer Unity package into your project
Set Api Settings
Because Narramancer depends on Odin Serializer, the .NET Api for your project must be set to 4.x.
Go to Project Settings -> Player -> Other Settings and Change Api Compatibility Level to “.NET 4.x”
Initialization
Before using Narrmanacer for the first time, you must trigger initialization by opening the Narramancer window.
Open the Narramancer Window by choosing 'Window -> Narramancer' from the menu bar.
Text and Choices Example Scene
Narramancer includes a handful of example scenes demonstrating some basic implementations of the system. They are located in the folder Narramancer/Scenes.
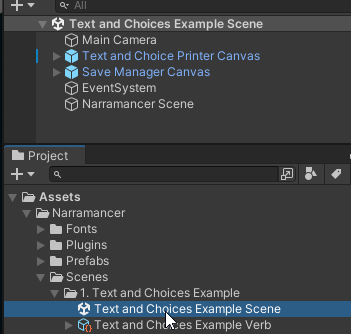
For a simple example of printing text to the screen and offering the player choice buttons open the Text and Choices Example Scene.

A screenshot of where the Text and Choices Example Scene asset is located in the assets folder and the contents of the hierarchy of the scene.
This example scene demonstrates simple text printing and choice selection. Upon entering Play Mode, the user is presented with a text dialog box which will progress when the user clicks on the screen. Eventually, the user will be presented with two choices, which will result in one of two text paths progressing.
The flow of this example scene is contained entirely within the ActionVerb asset named ‘Text and Choices Example Verb’. If you select the ‘Narramancer Scene’ object within the scene you will see the ActionVerb included in the list of ‘Run on Start Verbs’.
xNode
Narramancer is built using a modified version of xNode, an open-source framework for building NodeGraph editor tools within Unity.
While not required, it may be beneficial to read the xNode Getting Started documentation to better understand some of the terms and ideas Narramancer builds off of.